Ordering + Replacements FAQ
“HOW DO I PLACE AN ORDER?”
To order a project:
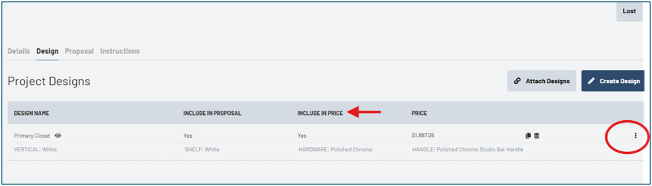
- First, make sure the designs in your project you want to order are marked as “Included in Price”.
- To include designs not already “Included in Price”, click the 3 dots on the right-hand side of the design, check the “Include in Price” checkbox, and save.
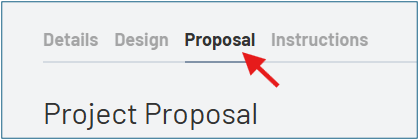
- Navigate to the proposal tab within your project.
- From there, click on “Send Proposal”.
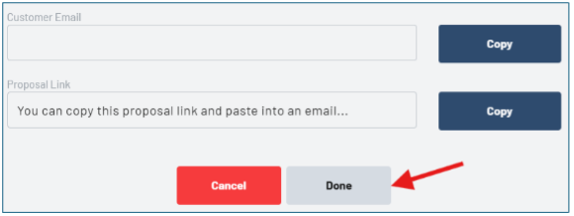
- Either copy the link and email it to your customer or click “Done” to skip this step.
- You will then gain access to the blue “Sold” button under your project total. Click on “Sold”.
- Click on “Project Sold” when a new menu appears, to confirm you want to lock your designs.
- You will then gain access to a blue “Order Project” button.
- Click on “Continue with Order” to send your project to the shopping cart.
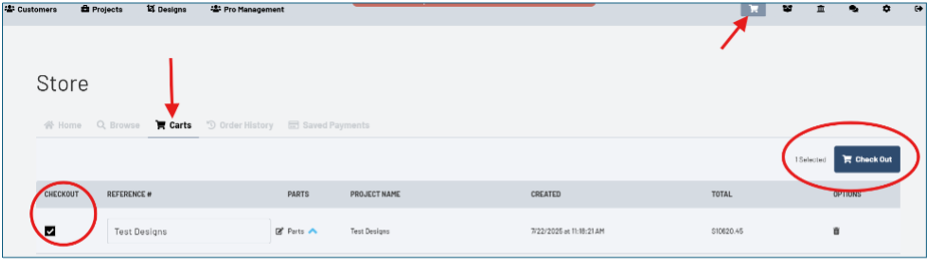
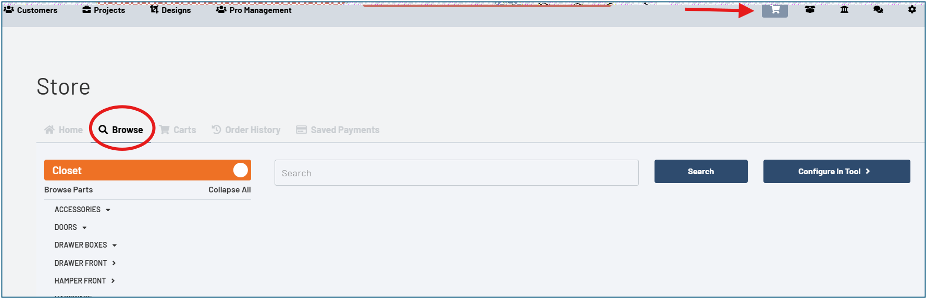
- Your project is now in the cart and ready to be ordered. Click on the Parts Store (shopping cart icon) and navigate to the “Carts” tab.
- This is indicated by red arrows below.
- Click the checkbox next to your project name and then click the blue “Check Out” button to proceed.
- This is circled below.
- Lastly, you will be prompted to enter the destination address, requested ship date, and your payment information.
“HOW DO I UTILIZE TEMPLATE DESIGNS?”
- Create a new customer.
- Create a new project for the customer.
- You will be automatically sent to the new project screen after creating a customer.
- The new project will serve as the landing place for the template copy.
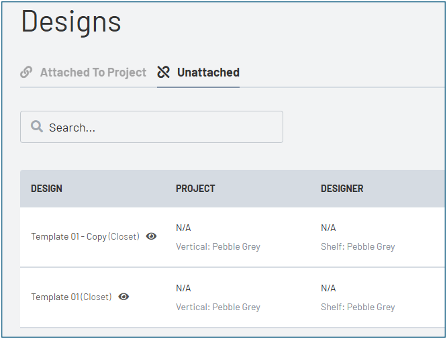
Templates are located in the “Designs” tab, directly to the right of the “Projects” tab in the Reseller App.
Click on the “Unattached” tab to access your list of templates.
- Create a copy of the template within the unattached design list.
- Pictured below, Template 01 was copied to create Template 01 – Copy.
“HOW DO I UTILIZE TEMPLATE DESIGNS?” (CONTINUED)
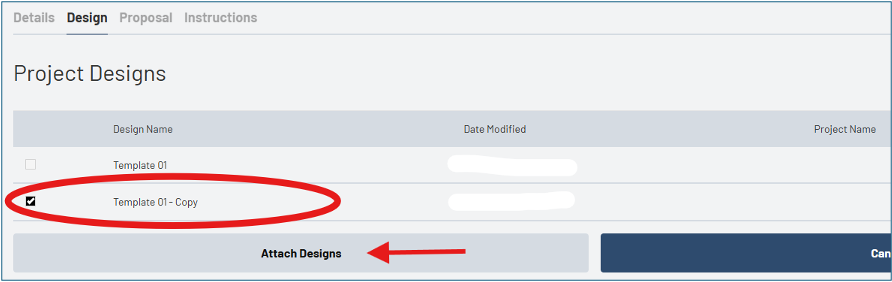
- Within the new project, select “Design” and “Attach Designs”
- Select the template copy you wish to add to the project and then click on “Attach Designs” below the list.
- Your project will now have a copy of the template you selected in its design list.
- Any created copies will be automatically marked as excluded in the total project price.
- To include it in the price, select the 3 dots on the right-hand side of the design name and check the “Include in Price” checkbox.
- Click save to lock in the change.
- The template can now be opened and altered, renamed, or repriced, depending on the current needs for the project.
*Please note – it is crucial to create an initial copy of the template in step 3.
This ensures the original template stays in the unattached list and can be used for future projects.
“HOW DO I ORDER INDIVIDUAL PARTS?”
Individual parts can be added to a new cart, or an existing cart (such as a project that is now in the shopping cart).
To order individual parts:
- Navigate to the Parts Store (shopping cart icon) and then the “Browse” tab.
Quick Tips
- Clicking the white toggle in the orange “Closet” box will give access to the garage product.
- Click the toggle again to return to closet product.
- The search bar is helpful for quickly finding parts.
- Simple terms work best. For example, "Vert" for verticals or "Rack" for tie and belt racks.
- If an item name contains "CTO", it is configurable to order
- This means you are able to select custom sizing for the item.
- Click on the desired category and item to open the next screen. At this screen, select the configuration and quantity needed.
- To create a new cart with this item, click on “Add to Cart”.
- To add this item to an existing cart or project, use the “Select Cart” dropdown menu, pictured below, to select the desired cart or project.
- Click “Add to Cart” once the dropdown option is selected.
- Navigate back to the “Carts” tab to place your order.
“HOW DO I REQUEST REPLACEMENT PARTS?”
Below are the steps to complete a CCF Form, and request replacement parts for missing or damaged products:
- In your Reseller App, click on the open box icon, titled “CCF Form”.
- Click on “Add New” and then choose the Sales Order Number you need replacement parts for, from the dropdown menu.
- Select the first part number you need replaced from the “Part Number” dropdown menu and the required quantity for that part.
- Click on the “Add Another Part” button to lock in the part number.
- If there are other parts needed, repeat steps 3 & 4.
- When you have locked in all of the required part numbers, click on “Review Submission”.
- This will take you to the final step of the CCF process.
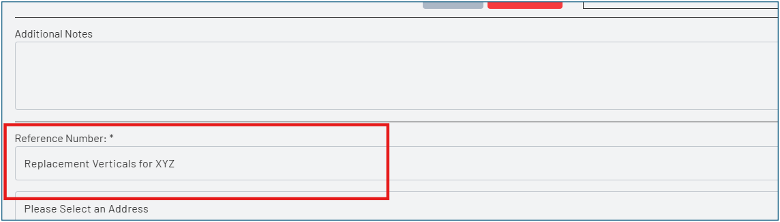
- Input where the parts should be shipped to, when you would like them to ship, and provide a reference number for the replacement order.
- Reference number is simply a name for the replacement order.
- For example, you could type “Replacement Verticals for XYZ Order”.
- Submit the request.